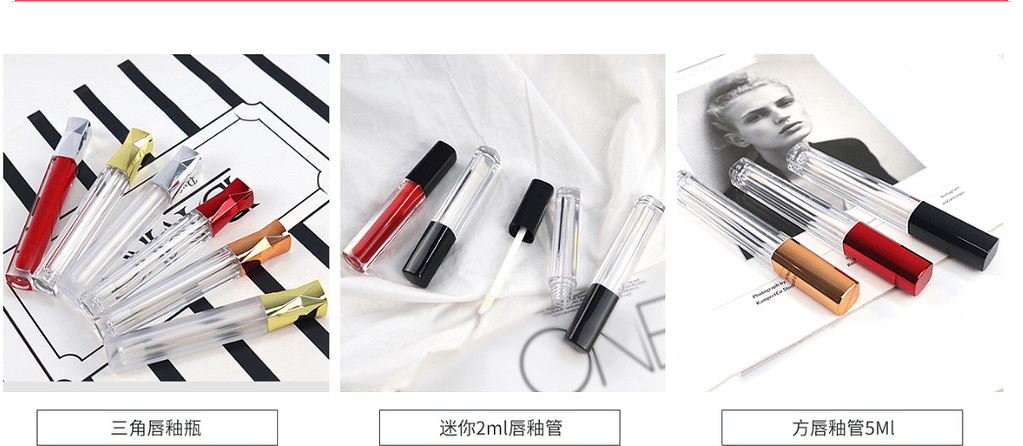
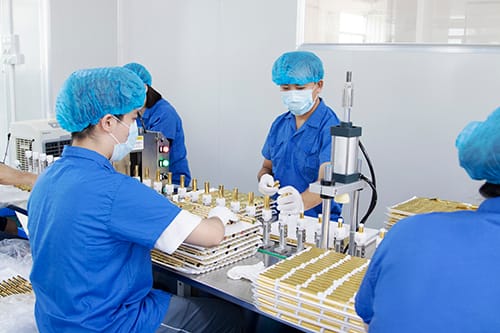
Custom lip gloss tubes are more than just containers—they are a fusion of brand identity, functional design, and manufacturing precision, with a direct impact on product appeal and user experience. Whether you’re launching a private label cosmetic line, expanding an existing range, or exploring small-batch projects, every step—from choosing finishes to final assembly—shapes the end product.
This guide synthesizes the creative, technical, and practical aspects of developing custom lip gloss tubes, while also highlighting how these principles extend to other cosmetic categories.

Foundational Decisions: Design & Material Selection
The earliest stages of custom lip gloss tubes development lay the groundwork for everything that follows. These choices balance aesthetics, formula compatibility, and project constraints (like timeline and budget).
Key Design Elements
Every design choice should align with your brand and user needs. Core considerations include:
Finishes & Visual Appeal
Brands often opt for shiny finishes (to convey luxury or vibrancy) or matte finishes (for a minimalist, modern look). Additional visual choices include clear vs. opaque tubes—clear tubes showcase the gloss’s color and texture (a selling point for pigmented or glittery formulas), while opaque tubes protect light-sensitive ingredients and allow for bold, branded color schemes.

Shape & Size
Tubes range from classic cylindrical designs to unique square or oval shapes (to stand out on shelves). Size is tied to functionality: common volumes (5ml, 10ml, 15ml) cater to travel-sized, standard, or value packs, and must fit comfortably in hands or makeup bags.


Functional Features
The cap (snap-on, twist-on, or magnetic for secure closure) and applicator (wand, doe-foot, or sponge-tip for precise application) directly impact user experience. For example, magnetic caps add a premium “click” feel, while doe-foot applicators are favored for even gloss distribution.


Material Compatibility & Options
Material selection is critical to preserving your lip gloss formula and ensuring durability. Key factors include:
Formula Compatibility
Tubes holding oil-based glosses require materials resistant to chemical leaching or degradation (e.g., polypropylene or aluminum), as oils can break down low-quality plastics over time.
Material Types
Plastics: The most common choice, with options like polypropylene (PP, lightweight and cost-effective), polyethylene (PE, flexible for squeeze tubes), or ABS (rigid, high-gloss, ideal for intricate logos).
Aluminum/Glass: Premium alternatives—aluminum offers a sleek metallic look and protects formulas from air/light, while glass is non-porous and fully recyclable (suited for luxury lines).
Stock vs. Custom
Stock tubes (pre-made shapes/sizes) reduce timelines and costs for small-batch or fast-launch projects. Custom lipgloss tubes (tailored to your design) require more lead time but offer full brand differentiation.
The Manufacturing Process: From Prototype to Final Assembly
Once design and materials are approved, the manufacturing workflow—whether handled in-house, via contract manufacturing, or through cosmetic manufacturing partners—follows a structured, iterative process to ensure quality and consistency.
Standard Production Steps
The process applies to both small-batch testing and large-scale commercial runs, with flexibility to adapt to volume needs:
Prototyping
Before full production, our teams create small samples (often 3D-printed or made with production-grade materials) to test functionality. Prototypes let you verify:
Cap fit (no leaks when inverted).
Applicator alignment (easy insertion/removal).
Visual accuracy (logo placement, finish consistency).
Mold Creation
For custom plastic lip gloss tubes, injection molding requires a custom mold (shaped to your tube’s design). Mold costs vary by complexity ( $5,000+) but are a one-time investment—critical for scaling production.

Component Production
Individual parts (tube bodies, caps, applicators) are manufactured via processes like injection molding (for rigid plastics) or extrusion (for flexible squeeze tubes).
Decoration
Custom branding is added here, using methods like:
Screen printing (for single-color logos).
Hot stamping (for metallic foil details).
Digital printing (for full-color gradients or photos).
Embossing/debossing (for raised/recessed logos, adding texture).


Final Assembly
Components (tube, cap, applicator) are assembled, often with quality control (QC) checks at each stage to catch defects (e.g., misaligned logos, loose caps).

Flexibility in Scaling
Most manufacturers accommodate varying volumes, making custom tubes accessible for all brands:
Small Runs
Limited orders (50–500 units) are ideal for testing market response or launching a niche product, with higher per-unit costs but lower upfront investment.
Large Batches
For established brands, scaling to 1,000+ units reduces per-unit costs (e.g., $0.50–$2 per tube) thanks to economies of scale.
Sample Runs
Many partners offer 1–5 free prototypes (with shipping fees) to validate design and functionality before committing to full production.
Practical Considerations: Time, Cost, and Compliance
Successful custom lipgloss tube development requires balancing creativity with practicality—understanding timelines, budgeting effectively, and meeting regulatory standards.
Timelines
Lead times vary based on design complexity and production volume:
Stock Tubes: 1–2 weeks (decorating pre-made tubes).
Custom Tubes: 4–8 weeks (including mold creation, prototyping, production, and assembly).
Key Delays: Tooling (mold creation), decoration complexity (e.g., multi-color printing), and shipping (especially for overseas manufacturers) can extend timelines—plan accordingly.
Costs
Cost drivers include:
Materials
Premium materials (aluminum, glass) cost 2–3x more than plastics (PP/PE/ABS).
Tooling
Custom molds are a significant upfront cost but reduce per-unit costs for large batches.
Decoration
Metalization is 10–30% to per-unit costs compared to injection,matte and uv caoting
Volume
Ordering 100,000 units instead of 10,000 can cut per-unit costs by 30–50%.
Beyond Lip Gloss: Applying Packaging Principles to Other Categories
The design and manufacturing logic behind custom lip gloss tubes are highly transferable to other cosmetic and skincare products. Key shared principles include:
Formula Protection
Air-tight seals (critical for lip gloss) also preserve serums, moisturizers, and liquid blushes by preventing oxidation.
User-Friendly Design
Applicators (e.g., lip gloss wands) translate to skincare tools like facial serum droppers or cream spatulas—both prioritize precision and ease of use.
Material Compatibility
Oil-resistant plastics (for lip gloss) are equally important for oil-based serums or cleansers, while light-blocking opaque tubes protect vitamin C or other l formulas (sensitive to light).
Sustainability
Recyclable materials (PCR ) or refillable tubes—growing priorities for consumers—work across lip gloss, skincare, and haircare lines.
Getting Started: A Roadmap for Success
Creating custom lip gloss tubes is a detailed process, but it becomes manageable with clear goals:
Define Your Priorities
Align design choices with your brand (e.g., luxury = metalization + hot stamping; eco-friendly = pcr materials+ refillable caps) and target audience (e.g., teens = clear tubes with glitter accents).
Test Early
Use prototypes to validate functionality (e.g., no leaks, easy to use) and aesthetics (e.g., logo visibility, finish) before scaling.
Plan for Scalability
Choose designs and materials that can grow with your brand—e.g., a custom mold that works for multiple tube sizes.
Final Note
Custom lip gloss tubes are a powerful way to differentiate your lip gloss product and connect with consumers. By combining thoughtful design, material compatibility, and practical manufacturing planning, you can create tubes that are both functional and on-brand.
For more guidance on exploring materials, finishes, or manufacturing partners, reach out to a alovey cosmetic packaging specialist to tailor solutions to your needs.


